Paperless-ng On Raspberry Pi With Email And Samba
September 25, 2021 paperless-ng raspberry-pi self-hosted ☕️ buy me a coffee
Paperless-ng is an absolutely fantastic document archival solution that you can host yourself! What I like about this compared to the traditional folders method is that tags allow you to avoid duplicates. Furthermore, being able to search content and titles with OCR is absolutely amazing. However, just out of the box this paperless-ng isn’t that powerful as it (obviously) lacks connectivity. My preferred approach to this is via samba and email. As well as this, I use a external HDD to store all the data.
In this tutorial I will outline how I have set up my locally hosted paperless-ng instance with samba and email.
Note: Paperless-NG is now being maintained in a new fork. See this post for more information on upgrading.
Table of Contents
External HDD
Raspberry Pis run the OS from a SD card. Typical sizes of these cards are anywhere from 4gb to 64gb. However, if you’re serious about a scalable archiving, then a larger SD card will be required. 128gb cards are dead cheap these days at around £35, but nothing beats a good old 1tb external HDD. If you’re content with storing all your data on the SD card, then skip ahead to the next section. You can always come back and add extra storage so don’t worry about this step too much if all you’re wanting to do is get paperless-ng set up.
First thing you’ll need to do is find the path to your hard drive. This is /dev/sda for me.
ubuntu@ubuntu:~$ sudo lsblk
NAME        MAJ:MIN RM   SIZE RO TYPE MOUNTPOINT
loop0         7:0    0  48.9M  1 loop /snap/core18/2073
loop1         7:1    0  57.4M  1 loop /snap/core20/1084
loop2         7:2    0  48.9M  1 loop /snap/core18/2127
loop3         7:3    0  28.1M  1 loop /snap/snapd/13171
loop4         7:4    0  65.1M  1 loop /snap/lxd/21462
loop5         7:5    0  28.1M  1 loop /snap/snapd/12886
loop7         7:7    0  65.1M  1 loop /snap/lxd/21507
sda           8:0    0 931.5G  0 disk
└─sda1        8:1    0 931.5G  0 part
mmcblk0     179:0    0  29.8G  0 disk
├─mmcblk0p1 179:1    0   256M  0 part /boot/firmware
└─mmcblk0p2 179:2    0  29.6G  0 part /
For reliable mounting, I like to use the UUID of the hard drive as the device path can change with mounts. This is found with fdisk -l as outlined below. Your UUID will be different.
ubuntu@ubuntu:~$ sudo fdisk -l /dev/sda | grep identifier
Disk identifier: 8CCB7408-46A1-4C76-BE9A-DBCD294DBF3F
Next step is to create a mount point for the partition. Please excuse my hard drive naming convention…
sudo mkdir -p /media/PORTABLE_UN/Next, add the following to fstab via your favourite editor (sudo vim /etc/fstab). Important: change your UUID and mount locations as needed. I like formatting my portable drives using exfat as this format is easily read on Windows machines too.
UUID=8CCB7408-46A1-4C76-BE9A-DBCD294DBF3F /mount/PORTABLE_UN exfat defaults,uid=1000,gid=1000,umask=022 0 0uid=1000 is the user id, guid=1000 is the group id, umask=022 this will set permissions so that the owner has read, write, execute. Group and Others will have read and execute.
To verify the config and to mount the hard drive, run sudo mount -a.
Samba
Samba is a great solution for a locally hosted, networked instance of paperless-ng as it allows both windows, linux, and macOS devices to easily access the files. There are many many tutorials on how to use samba with your particular OS, such as via windows file explorer or by mounting the share using fstab, so I don’t feel the need to cover that. However, outlining how to setup samba on the RPi for paperless is unique.
Firstly install samba and the associated common binaries.
sudo apt-get install samba samba-common-binThen we create a folder somewhere on the filesystem. This tutorial uses a portable hard drive and thus we create a folder called paperless on it. You can use any folder you desire though. Just make sure to change the steps as needed.
mkdir -p /media/PORTABLE_UN/paperlessAdd the following to the end of /etc/samba/smb.conf
[piperless-ng]
path = /media/PORTABLE_UN/paperless
writeable=Yes
create mask=0777
directory mask=0777
public=no
Samba security works by allowing selected users access to partitions if public=no. This means your $USER is being added to the known list of users with access. For me this is ubuntu as I’m using ubuntu server. The user is granted permission with sudo smbpasswd -a $USER.
After all these changes have been made, restart smbd on the RPi.
sudo systemctl restart smbdIt’s always good practice to test that a service is properly configured after slaving away at the configs! For this particular case, the following gives us a quick overview:
$ smbclient -Uubuntu -L //192.168.0.73/
        Sharename       Type      Comment
        ---------       ----      -------
        print$          Disk      Printer Drivers
        piperless-ng    Disk
        IPC$            IPC       IPC Service (ubuntu server (Samba, Ubuntu))
SMB1 disabled -- no workgroup available
Note that my RPis ip address is 192.168.0.73 and my samba user is ubuntu.
And that’s it! Samba is now set up for any verified user to use on your local network.
Paperless-NG
Actually setting up paperless-ng is incredibly simple thanks to docker-compose (install it by following this great tutorial). Firstly we’ll download the config files for sqlite. Sqlite is lower power than postgres but obviously isn’t as powerful. If this instance of paperless-ng was being hosted on a more powerful machine, use postgres.
We download the previously mentioned docker-compose.yml using curl as below. Note we’re using the arm flavour of the paperless-ng docker-compoes file as normal apache/tika does not support our architecture. For more info head to iwishiwasaneagle/apache-tika-arm.
curl https://raw.githubusercontent.com/jonaswinkler/paperless-ng/master/docker/compose/docker-compose.sqlite-tika.arm.yml -o docker-compose.ymlI have then adjusted the file as follows:
48c48
<       - 8000:8000
---
>       - 9003:8000
55,59c55,58
<       - data:/usr/src/paperless/data
<       - media:/usr/src/paperless/media
<       - ./export:/usr/src/paperless/export
<       - ./consume:/usr/src/paperless/consume
<     env_file: docker-compose.env
---
>       - /media/PORTABLE_UN/paperless/data:/usr/src/paperless/data
>       - /media/PORTABLE_UN/paperless/media:/usr/src/paperless/media
>       - /media/PORTABLE_UN/paperless/export:/usr/src/paperless/export
>       - /media/PORTABLE_UN/paperless/consume:/usr/src/paperless/consume
75,78d73
<
< volumes:
<   data:
< media:- I change the outward facing port from
8000to9003as this suits my needs. - The
dataandmediadocker volumes are changed to folders on my HDD to save space on the SD card. - Similarly,
./exportand./consumeare changed to the hard drive too for consistency. No data lives in these folders for long but I like having it all in one space. - The
env_filehas been deleted as I haven’t customised my setup.
Next pull the docker images with docker-compose pull and create a paperless-ng superuser with:
docker-compose run --rm webserver createsuperuserEnter any username and password you’d like.
And finally to run your own instance of paperless-ng, run the following:
docker-compose up🚧 NOTE: The process for authenticating gmail accounts has changed. Have a look here for more information.
Paperless-ng makes it super simple to pull attachments from your emails. However, the IMAP method is simple and effective but I don’t like having my all-important gmail account’s password in a config file. Therefore I use a email account who’s sole use is being forwarded attachments.
For this step, you can use any email provider with IMAP support. I like using a throwaway gmail account that’s easy to remember. For the sake of this tutorial I’ll call it [email protected] with password G4kHXBurC7ngUt (both of these are random and any likeness to real emails or passwords are coincidence 😉 ).
Firstly, you must enable access to less secure apps as outlined here and then enable IMAP support as described here.
Next you must complete the following two steps
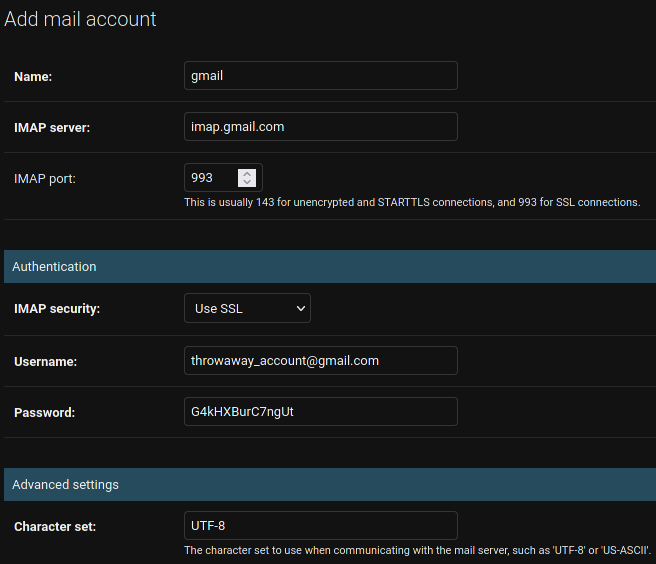
1. Add your email
Navigate to http://localhost:9003/admin/paperless_mail/mailaccount/. In this form you have to fill out the necessary IMAP information + a unique and identifiable name for this email.
This would be my setup for the aforementioned throwaway gmail account:
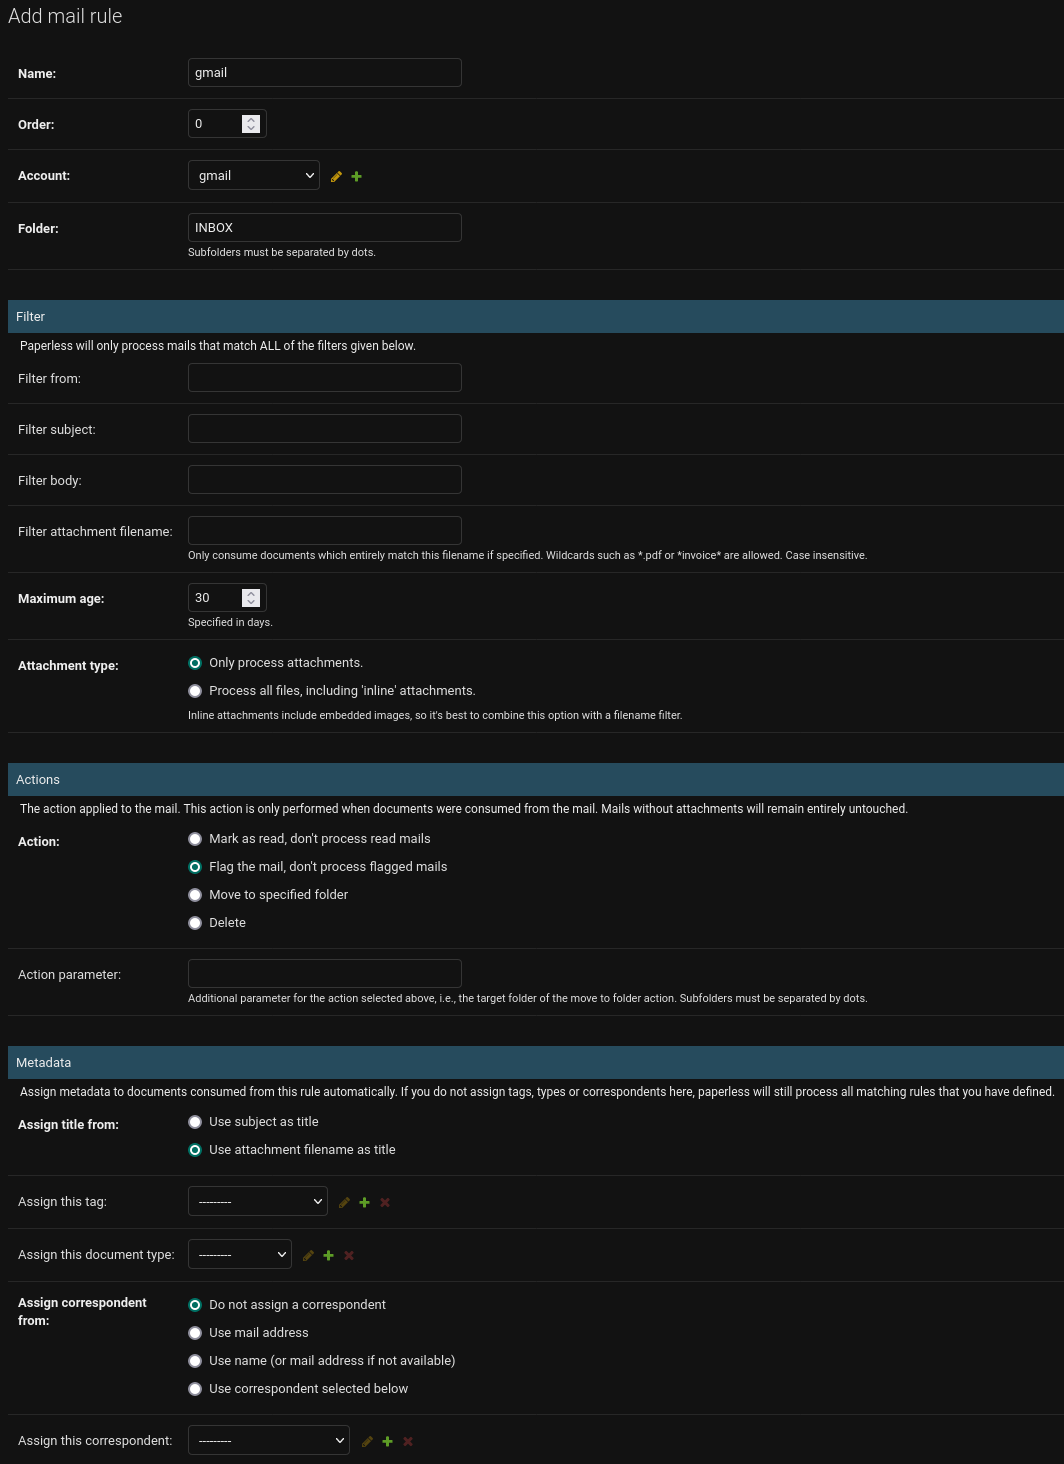
2. Add a email rule that works for you
Once you’ve added an email account, you must add a rule to scrape your incoming emails. You can do this at http://localhost:9003/admin/paperless_mail/mailrule/
The following is the setup that works for me:
Conclusion
Paperless-ng is a truly amazing piece of FOSS software. Coupled with other common tools, like samba and email, it becomes a must have for anyone looking to archive documents.
Please show the paperless-ng some love here by staring the repo and if you have any comments, questions or queries about my setup, please use the comment section below!